Lego Vehicles
Like most tutorials, this document makes no attempt to be a complete reference to building a Lego vehicle. There are far too many types of elements and styles to cover them all here and way too many reasons for vehicle creation. But what IS covered here are some things that builders may need to consider before obtaining parts for or designing a vehicle which will be useful to their desired application.
Everything from the simplest vehicle to an exact replication of a real vehicle will require some planning before the build. Of course the amount of planning required varies based upon the complexity of the build. Even if a builder does not realize it, planning occurs even if specific time is not devoted to it. With that in mind, making an effort to consider (plan) what result is desired can go a long way to getting a successful result in fewer modifications. Below we will look at some things which may be included in the planning thoughts.
WHAT IS A VEHICLE
:
A loose definition for vehicle
is a thing used for transportation
of people or products
. A vehicle may or may not have: a motor, wheels,
an operator compartment, or a storage area. It may travel on land, water,
or in the air (including outer space). Some portions of this document will
deal with specific vehicles (such as those with wheels), but most of the
principals can be applied to any type of vehicle.
But every vehicle must has a FRAME, which is whatever it is that holds
all of its parts together. And because it is for transport
, we can
assume that it 'moves' and therefore can be 'steered' (even if implied
without an actual steering device shown). All of this may seem trivial,
but as we will learn below these can be important things to consider.
Most of the discussion here can apply to non-vehicle models also. With such a broad range definition, a vehicle can be so many things that it would be difficult to NOT have something in common with other types of models!
SIZE AND SCALE DIFFERENCES:
Vehicles can be built WITHOUT people inside. But if a model is to be
anywhere near a 'realistic' scale we must consider the space which
needs to be designated for a person or maybe a proper scale when
compared to a person. In the world of Lego, people are called
minifigures
(or minifig
). So this section takes a look
at the possible issues which are encountered for a realistic scale
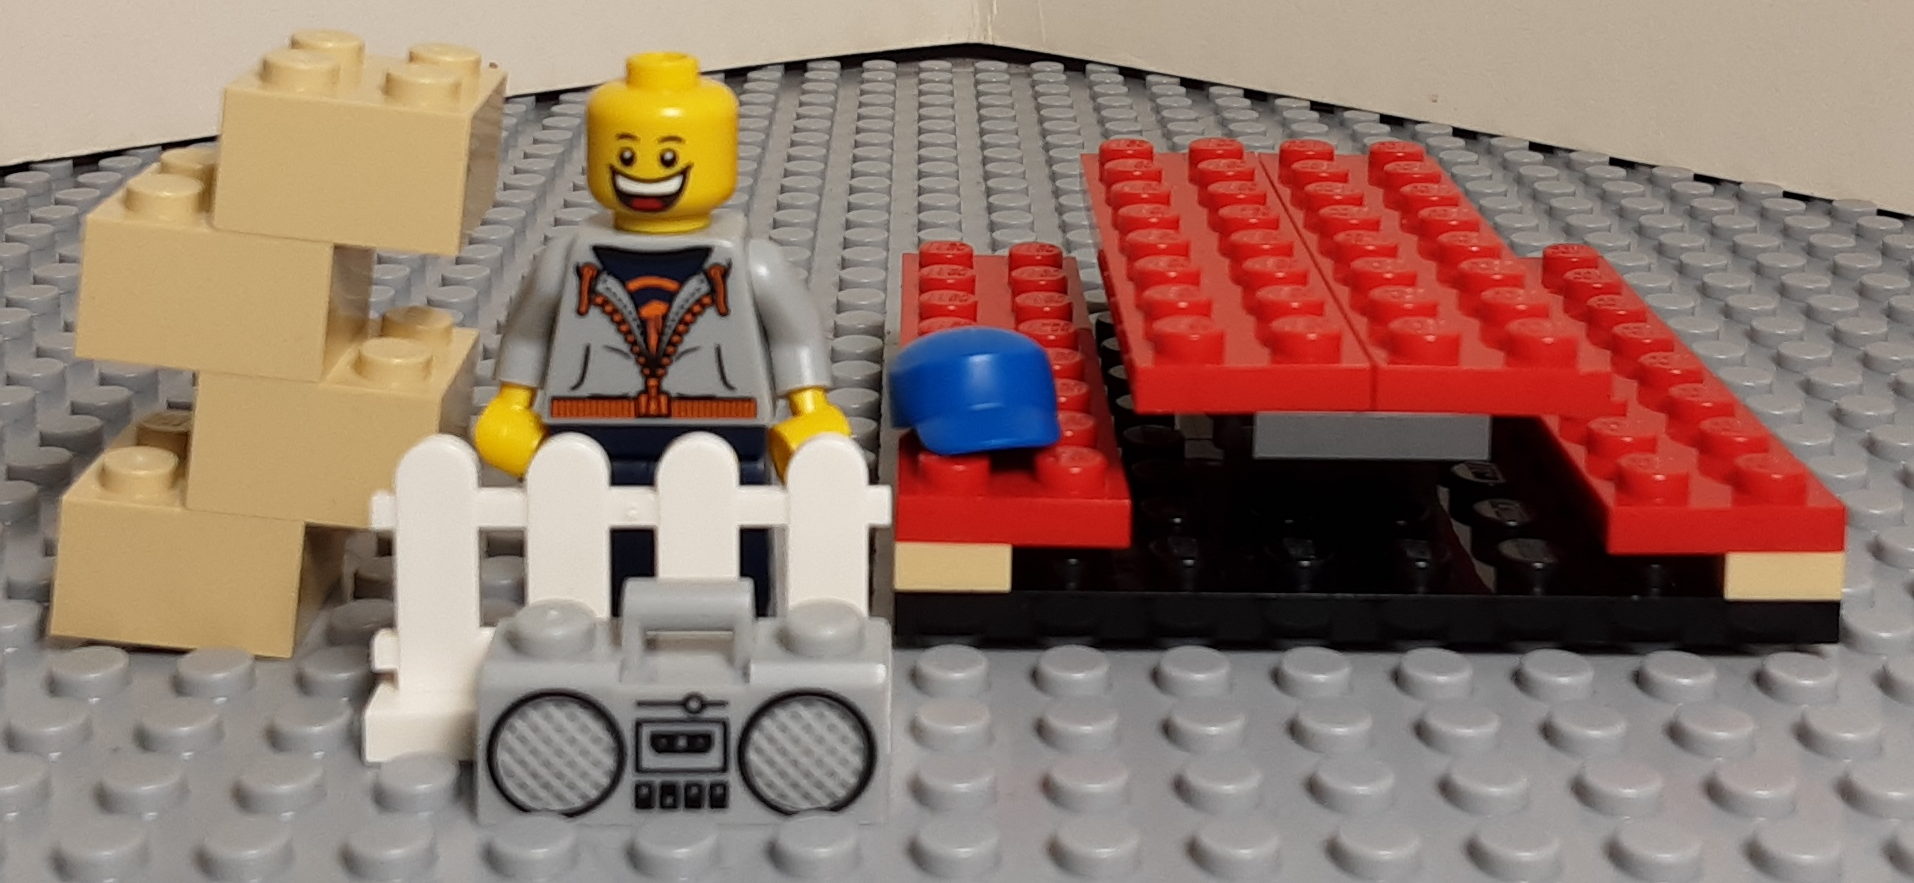
based on people. Notice that in the Lego world 'real scale' is not
accurate across all items (notice the size of the boombox, fence,
and minifig) for actual human world item sizes.
| - | HEIGHT | WIDTH | DEPTH |
|---|---|---|---|
| MINIFIG |
1.575in
40mm |
.63in
16mm |
.315in
8mm |
| HUMAN | 63-69in | 16in | 8in |
| SCALE | 44:1 | 25:1 | 25:1 |
In case a builder wants to create a vehicle for a real human, the table shows the huge difference in proportion of minifig:human height versus width and depth. In this event the concept of calculation using a minifig is abandoned in favor of simply using real world dimensions.
If a builder wants to create a vehicle for Minifigs, the scale is simply based upon the size of the minifig and there is no need to consider human properties. But even at Minifig scale a vehicle can become quite large. Consider the fact that Lego set vehicles with minifigs inside are usually 6 studs wide. These seat only ONE minifig across (4 studs). Each additional minifig across adds at least 4 studs (no gap between) to the vehicle width. So to build a standard car which can seat 3 people in the back seat, the vehicle needs to be at least 14 studs wide! Now if this vehicle is also properly scaled in length (front to back), using a rough 2:1 ratio means the vehicle will be 28 studs long! This also affects the vehicle height, needing to be about 11 bricks and 2 plates high!
In order to have a smaller vehicle, we need to consider what is important to include. Many builders abandon 'real life scale' in favor of 'realistic scale' or even just use something that looks close. As mentioned above, Lego sets use a minimal width and apply a 'close' length and height ratio as needed to fit whatever accessories needed inside. Many builders follow a similar style in their vehicles unless there is a need to use a more accurate scale value.
Beyond the scale factor, a vehicle must be large enough to contain whatever the builder wants inside of it. So many builders create the contents first, then calculate the vehicle size based upon size of space required for the contents. Fewer contents usually allows for a more flexible vehicle design, so deciding what is really important to include is often useful. If the vehicle has a door used to insert/remove items, the door must be big enough for the largest item and that could also increase the size of the vehicle.
There are many challenges associated with building vehicles to any scale
or realistic properties. Flexibility in design is extremely helpful for a
builder! The end goal is usually does it look right
instead of
is it totally accurate
. Many builders want visitors to recognize
a vehicle for what it is rather than for its accurate ratio and they also
view other builders vehicles in that same respect. So the best advice on
this topic is to consider all of the points above and then proceed with a
design that meets the most important qualities of the vehicle desired.
WHEELS, WINGS, AND OTHER THINGS:
The previous section discussed size and scale issues, but we aren't completely done with that discussion yet! Vehicles which include external wheels, wings, propellors, engines, or other structures should have a similar scale to these parts. A large car with small wheels looks awkward as does a small aircraft with huge wings. Fit the vehicle size with the appropriate frame and accessories.
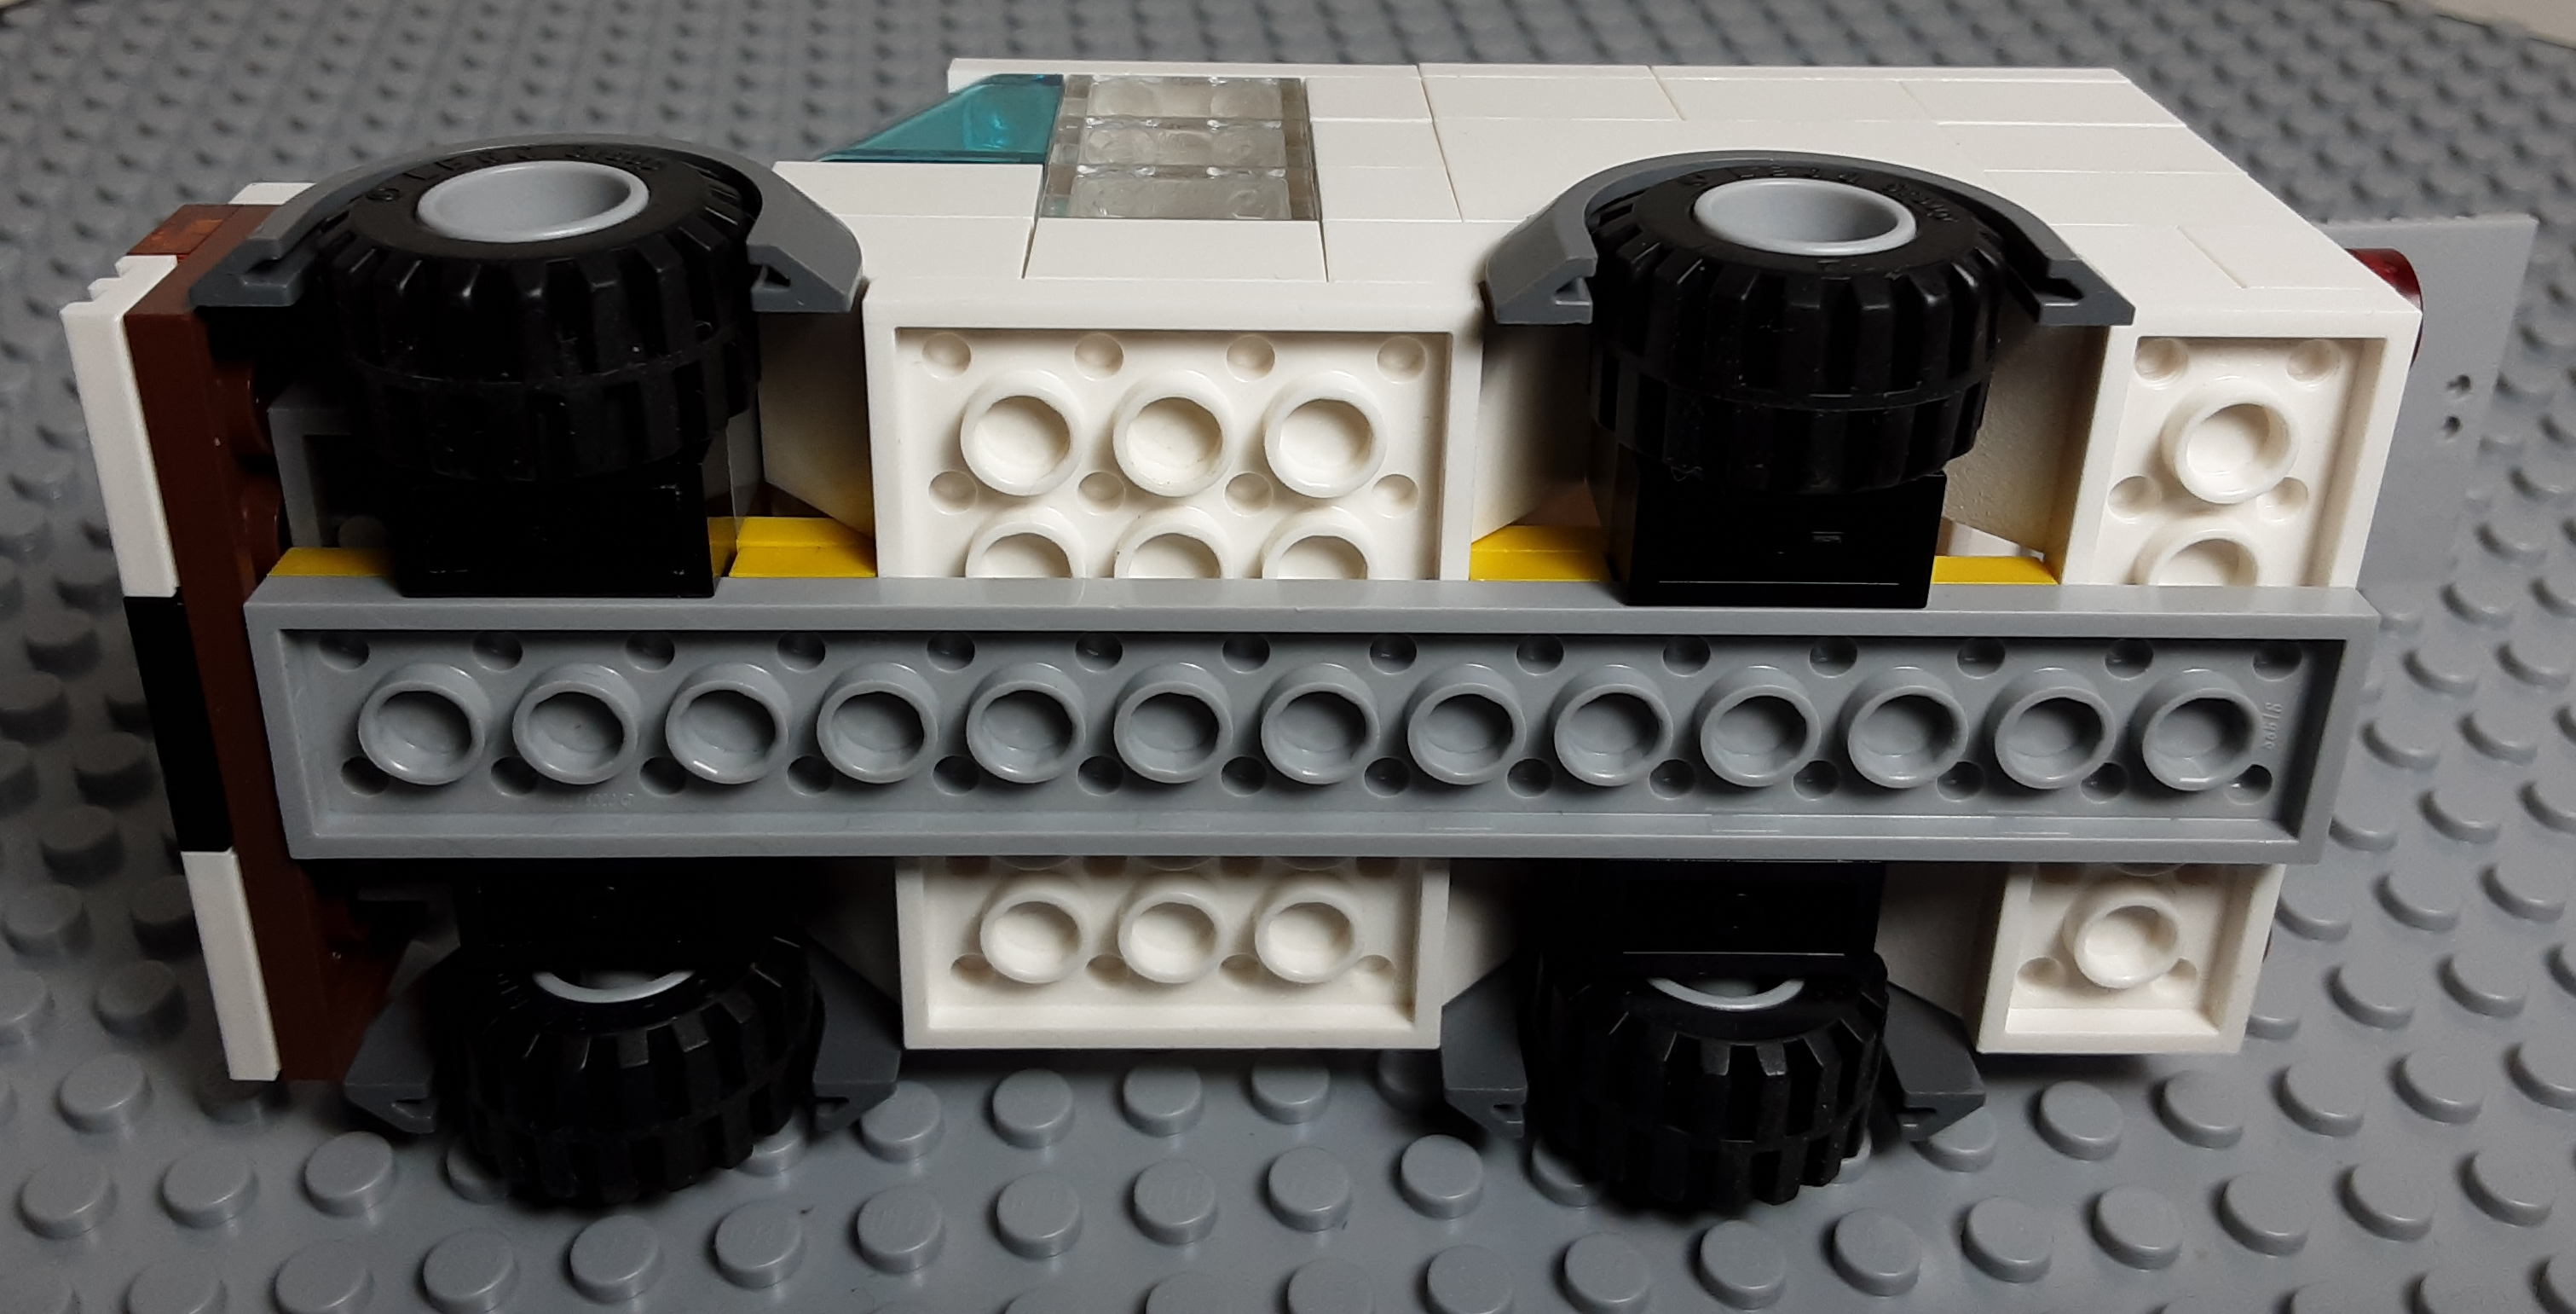
The vehicle frame should be well supported by any item(s) which carry the weight of the vehicle (wheels, wings, etc). Usually these items are directly connected to the frame to insure durability. Often these items will have an impact on other aspects of a vehicle, such as the wheels of a car limiting the space inside of the car as wheels are usually within the vehicle width rather than outside of it.

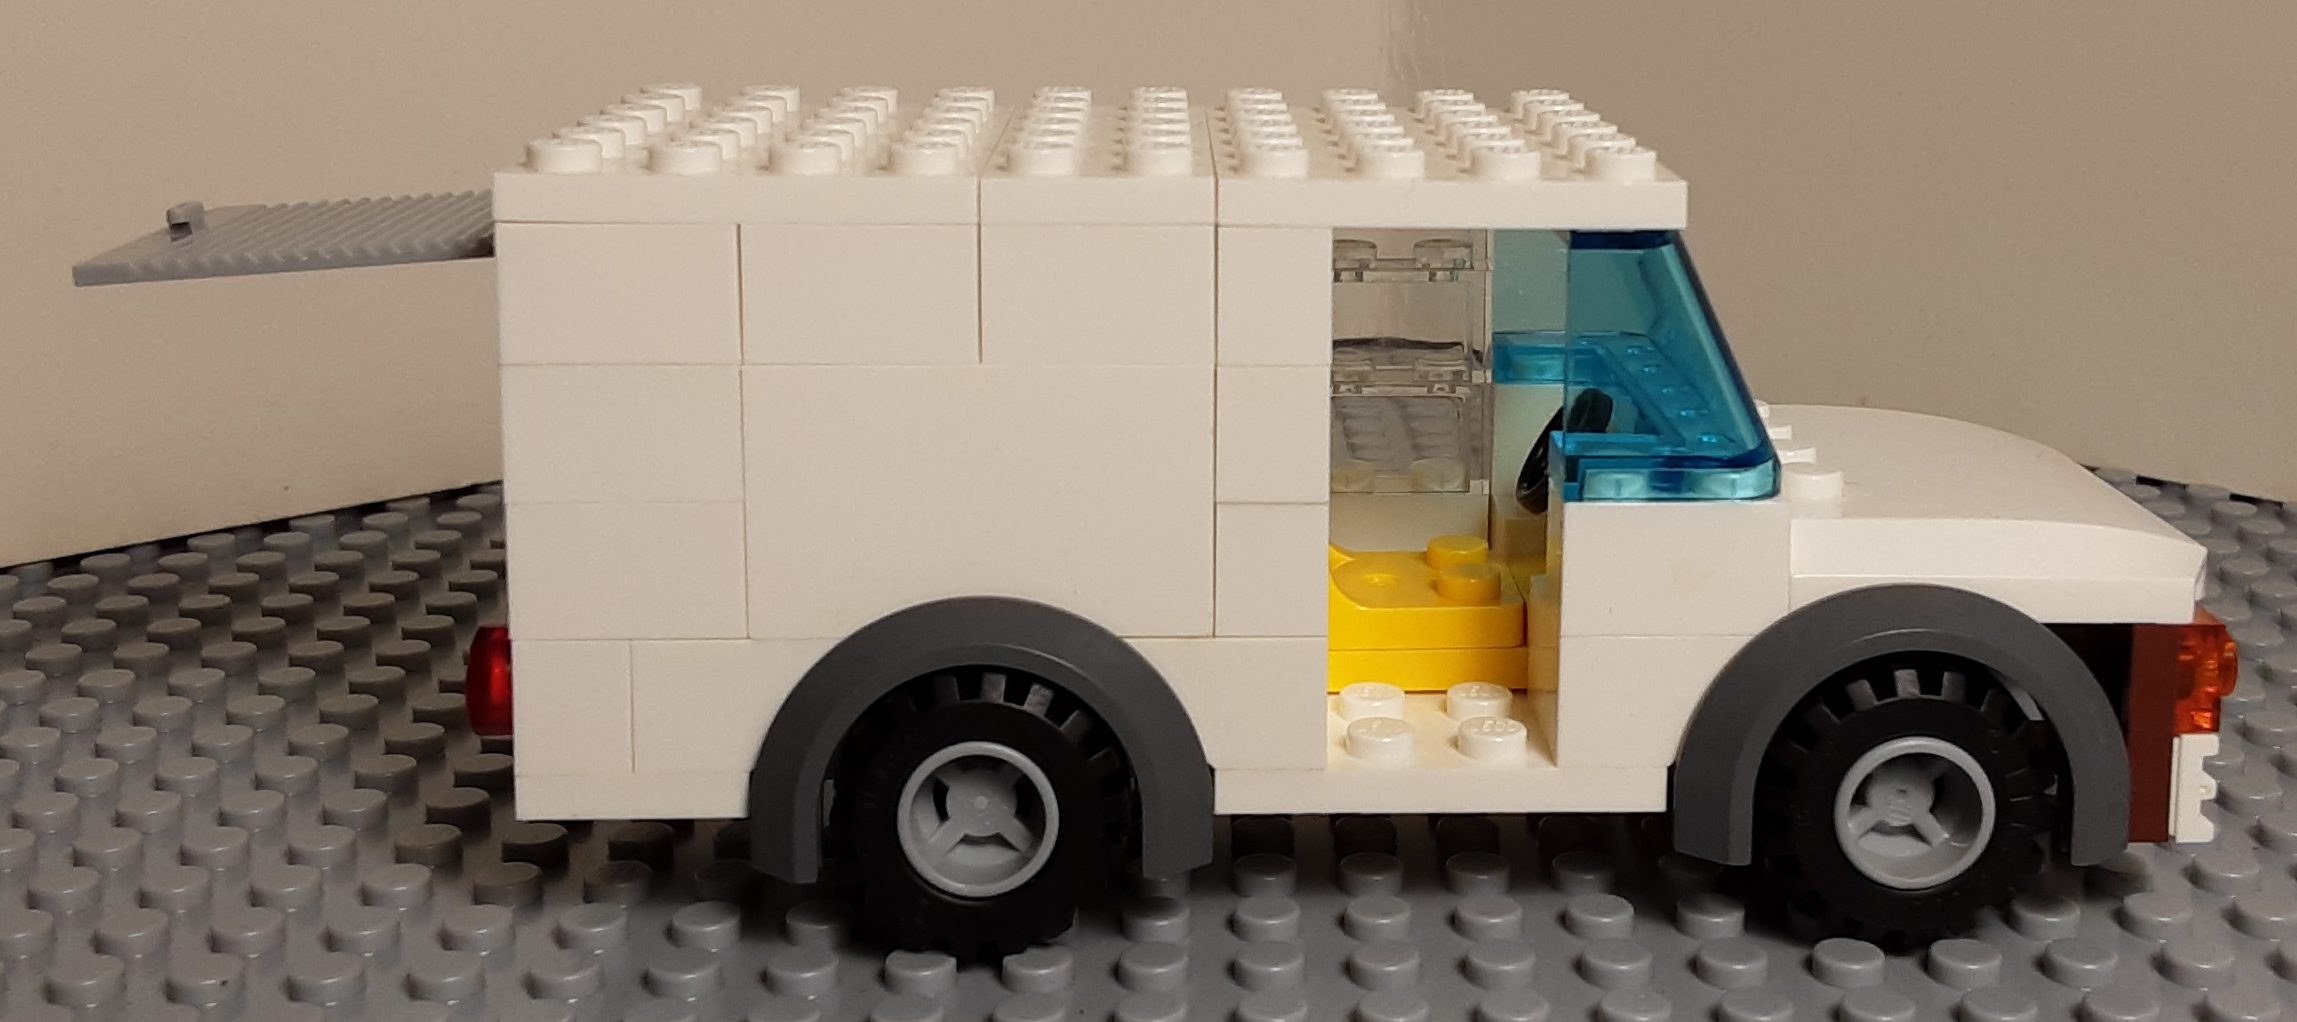
Personally, I like to put the wheels as close to the front and back of a vehicle as possible to allow for more space in the middle areas. This also improves the ability of the vehicle to encounter inclines or uneven terrain better, without the bumper scraping objects. Having good clearance for wheels (or wings, propellors, and others) improves a vehicles performance and durability. For the small van the wheels reduce the floor area in the cargo space, something that a builder often just has to accept.
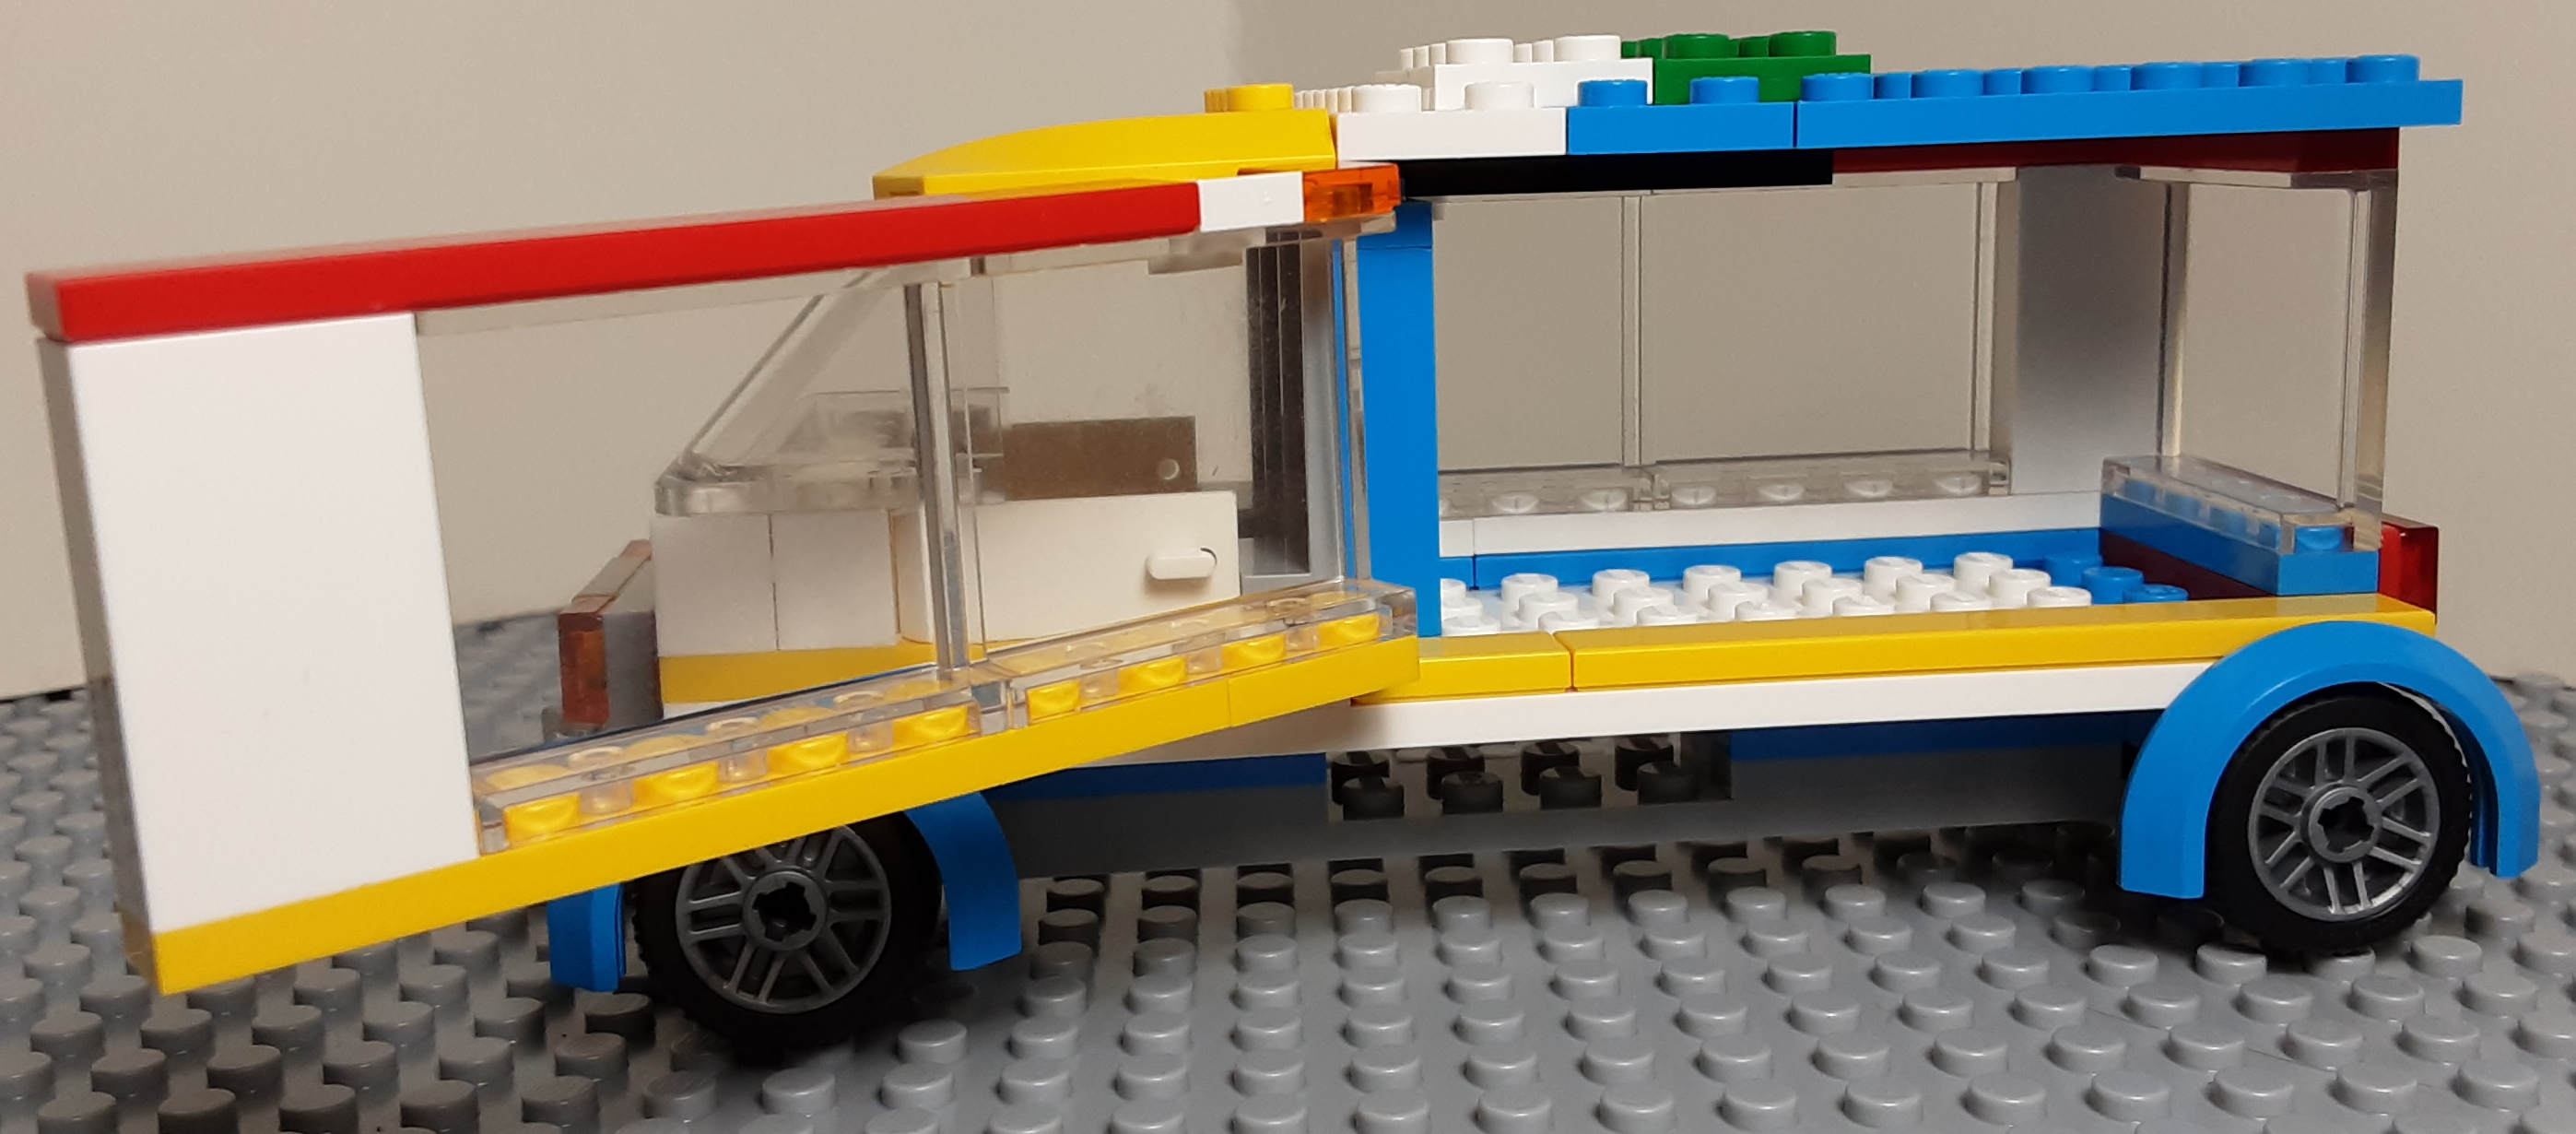
Many types of vehicles have windshields to protect the passengers. The size, shape, and location all play an important role in how effective the windshield is related to the other properties of a vehicle. Often this will also act as a support for the roof, so in these cases it needs to be well supported itself.
Any doors or other movable parts of the vehicle structure need to have the freedom of a motion path to operate. The design should include surrounding structure to support anything above these items so no weights is applied to inhibit their movement. Often larger plates are used as vehicle roofs so that they have many anchor points to provide a good coverage. For this reason most vehicle bodies have an even number of studs (width and length), as larger plates have even number dimensions.
If a steering wheel (or levers) or a seat is included in the model, there should also be room for a person (even without one actually there). Although minifig bodies are 2 studs wide, the arms extend at least an extra stud in each direction. So a driver compartment will be at least a 4x4 area. Any roof over this area needs to be supported, although often these roofs are designed to be easily removable to allow access to this area.
With all of the above in mind, the vehicle base (or floor) should be large enough to support everything above it. This must either be well supported by the frame or be a part of the vehicle frame. For vehicles with wheels which rise above the floor (as most realistic vehicles have), the floor has to work around the wheel area. Thus if the vehicle has a 4x4 area for people (as noted above) which is near a wheel area, the vehicle width may need to increase to accommodate it. Floors are often made of larger plates (like roofs) mounted to any structure below them. Smaller plates are used when working around wheel areas or other structure in the way. Sometimes it is necessary to extend the floor base outward to support walls once the height is above wheels or other obstacles.
So the frame and floor design is a very important thing to consider when building a vehicle! The simple step of planning these dimensions before construction begins can save a LOT of time and effort (rebuilding) later on. Knowing what must be included in the vehicle helps to plan the design. So often a builder will construct the contents before they start to construct the actual vehicle.
COMEDIC INSPIRATIONS:
So far everything discussed has been about building a serious vehicle. That is, a vehicle made to be at least somewhat realistic in use and appearance. But sometimes a builder can intentionally add humor into the vehicle design 'just for fun', which is something I often do.
If the goal is to create a funny and/or sarcastic vehicle, the size or scale of the vehicle is often intentionally skewed in some manner. But even a funny vehicle should be structurally sound, so any modifications to 'good building practices' for humor may need to be compensated for in other respects.
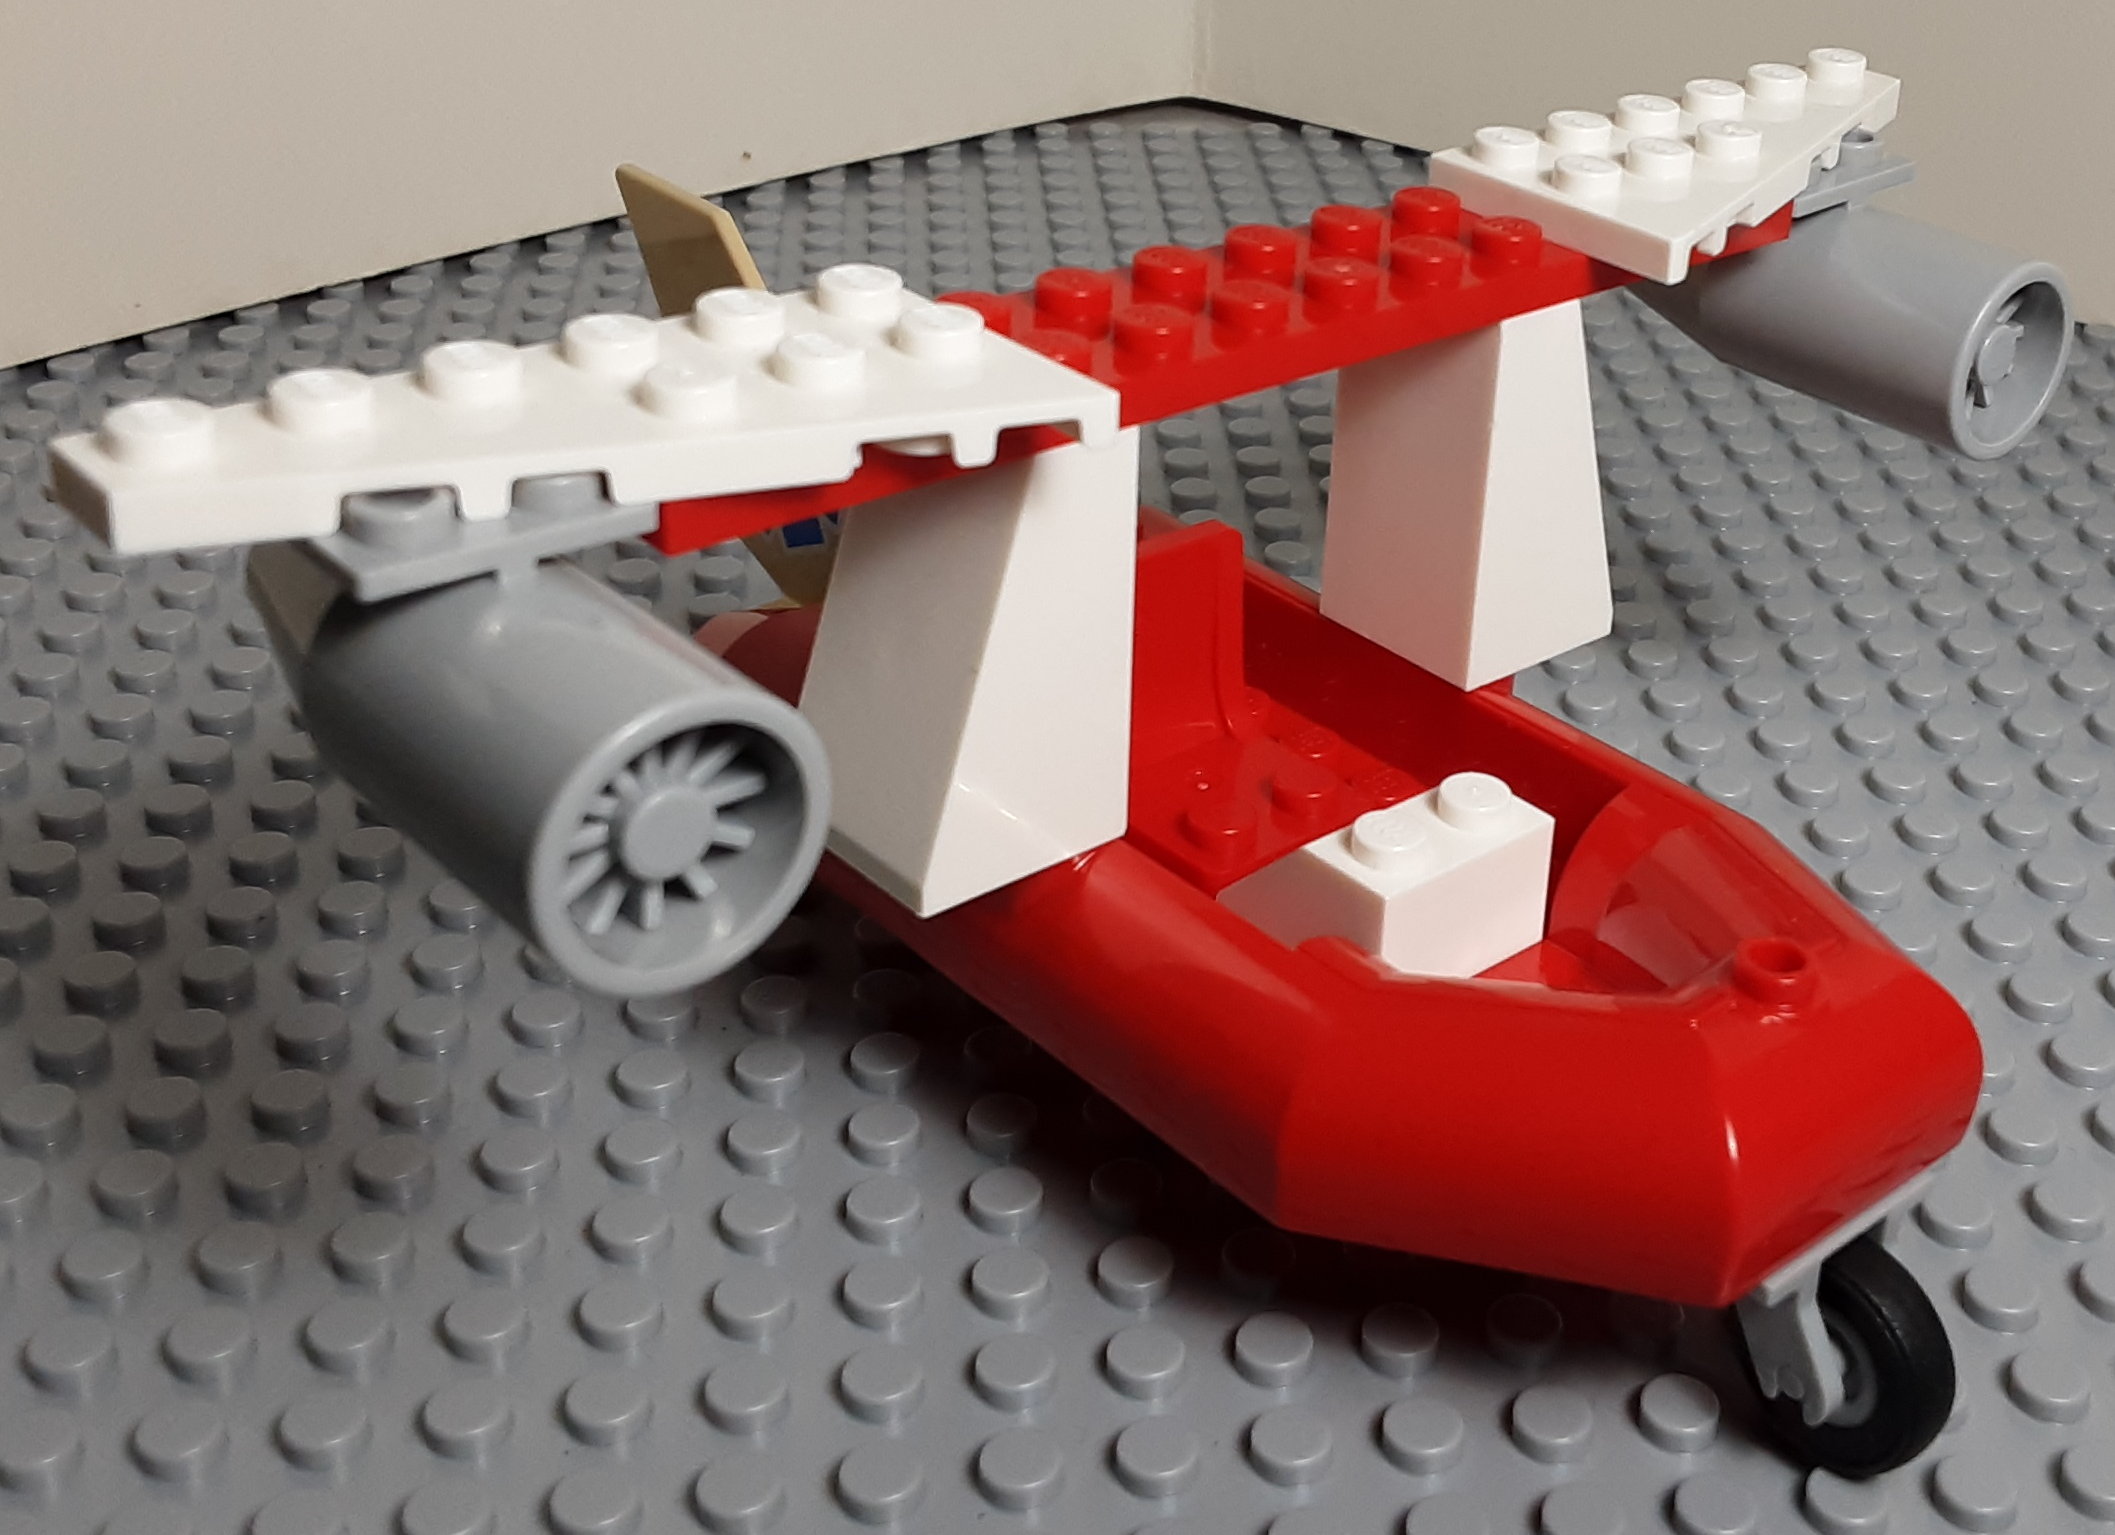
Cabopla(CAr/BOat/PLAne)
My Cabopla
model is an example of a humorous vehicle. It
combines qualities of a car, a boat, and an airplane in one
simple vehicle. There is no attempt made to have any part of it
be to an accurate scale with any other part of it. The boat acts
as the 'frame', with the wheels, wings, and tail mounted to it.
The wheels are fully below the frame (boat) as there is no way
to modify the boat (a one piece element) to allow for wheels.
Sometimes humor is accomplished by having a vehicle NOT be structurally durable. An 'exploding car' was created, when it collided with something the doors, hood, roof, and trunk all fell off. This was possible because a movable beam was mounted within the frame that when pushed back made contact with the 'exploding' parts and pushed them outward. When creating such effects, the parts designed to come off must still be able to remain in place until that action is desired.
As mentioned in the section about size and scale, the use of over/under sized parts is another way to add humor. A small car with huge wheels looks funny as does a large car with tiny wheels. Mis-scaled doors, windows, or other objects can add a bit of a twist on reality. Changing the location of these parts can also result in humor.
Often the contents can be humorous rather than the vehicle itself. A serious pickup truck can be hauling something funny. One display featured a few parade floats, all decorated for the theme of the display in various humorous designs.
Even though a big part of the joy in building with Lego is in the fact that we can create something useful, there is an added pleasure in also making it fun too! Imagination and creativity include making us smile or laugh.
STICKERS AND DECORATION:
Lego often includes some stickers in sets to add content in a quick and easy manner. These help to make certain things more attractive without having to actually build them out of elements. They also include parts for purely decorative (non structural) properties, such as flowers or food. Builders can also create their own stickers or other types of decoration in the same fashion.
A builder can use graphic software to generate a design and then print it onto label paper (various sizes exist) to make custom stickers. Be careful to create stickers using the correct size as Lego elements are in millimeters (mm) not inches. Clear (transparent), white, or colored label paper can be used. Transparent labels retain the color of the elements it is attached to, but background color can be printed on white labels also.
Due to the slight corner curvature of Lego elements, a sticker should be sized slightly smaller than the element dimensions. It can be tricky to exactly place a sticker onto a part, so Lego makes their stickers even a bit smaller to allow for some error. It is also possible to make a sticker slightly larger than the part surface and trim it to size after placement. Be very careful trimming stickers on parts so as not to scratch the part itself.
Using certain color pieces is one way to decorate a model. This can be useful to create a color scheme such as having one color stripe on another color background. Colors are often useful to highlight well known symbols or logos. Stickers become useful if the specific color parts are not available to a builder at the time of construction.
Decoration or details can also be done with small parts, alone or together. These can help to add life to models beyond just an ordinary flat design. The use of elements with side knobs on walls or other surfaces can allow for decoration to be added to those areas. There are many methods and styles possible for these additions.
Stickers and decorations can be included in the initial planning process but are often the last things actually built. Because design plans can be altered during the building process, detail work is best left for later. Once a builder is comfortable with the way things look when it is 'finished', the detail work can be visualized better.
CLOSING THOUGHTS:
Even the best builders admit that it can take them many attempts to get a vehicle created the way they want it to be. And even then they may modify it in the coming weeks or years. Be patient with your work speed and flow. Be open to trying different things and flexible enough to consider design changes or structural modifications.
Page last updated: June 24 2022 08:57:54.
Page visited: 903
Terrys Place
Book, Motivation speaking, and Bullys
Facebook page
ICIC-ation YouTube channel
Vision and Driver/Bike/Pedestrian safety
Website design
Website programming and utilities:
© 2001-2025 Terry Erickson, All rights reserved.
Website layout and content:
© 2001-2025 Terry Erickson, All rights reserved.
Website hosting:

Proudly made in the USA!